Python and Kafka: message passing and more
At many stages during a developer’s career, he/she has to build systems capable of communicating with another. For example, there may be two python programs and the second program’s operations might depend on the output of the first program. There can be multiple programs in that linear sequence, with every consecutive program depending on the output of the previous. The linear sequence may even branch out to two child programs depending on the output of the previous. An example dependency graph is shown below.
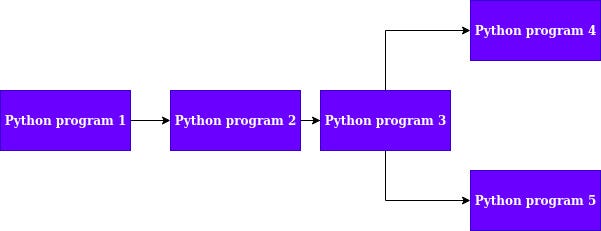
As shown in Fig 1, program 2 depends on the output of program 1. Similarly, program 3 depends on the output of program 2. Program 3, in turn, branched out into two children programs accepting output from 3. If the objective of the developer is to make program 4 and program 5 run in parallel then he/she will have to make asynchronous calls to these programs in a multi-threaded fashion. Since python is not inherently thread safe, making scalable multi-threaded systems becomes a bit difficult. This is where Apache Kafka can be used.
Let me give you brief introduction of Apache Kafka before moving into it’s implementation and integration with Python.
A software platform developed by LinkedIn, Kafka *is an open-source stream processing pipeline which was later donated to the *Apache Software foundation.
 at [https://kafka.apache.org/](https://kafka.apache.org/)](https://cdn-images-1.medium.com/max/2000/1*8GbrXbHdH5uPGMb5epWhrg.png)
As mentioned on the official Apache site, Kafka can be used for creating data pipelines that are horizontally scalable, extremely fast and fault-tolerant.
The use-case involving python programs given above is not an exact streaming pipeline but Kafka can be used to solve the problem of sending messages to programs for execution and can be also be used to horizontally scale the information between programs.
Let’s move forward to see how this can be done.
1. Installing Kafka on Ubuntu and Confluent-Kafka for python:
In order to install Kafka, just follow **this** installation tutorial for Ubuntu 18 given on **DigitalOcean**.
***Confluent-Kafka*** is a fully managed enterprise platform for Kafka services.
Confluent also ships a Python Client for Kafka, which can be used to integrate Kafka directly with python. This client can be used to create topics, delete them and also send and receive messages.
2. Using Kafka with python:
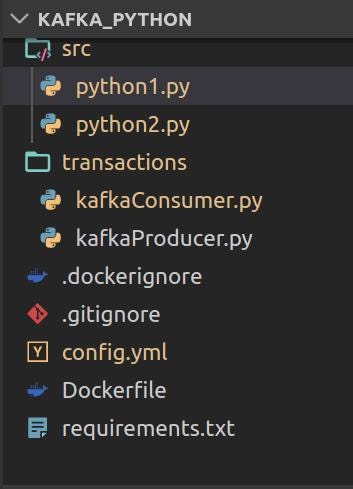
Let’s begin my making a project folder.
We will be carrying out the experiments using Docker since it’s a wonderful piece of technology and makes a developer’s life extremely easy.
A good practice would be to have two project folders, but for this experiment would be using just one. To execute the python programs we will be going inside the containers and running and them manually.
If you want a pretty tutorial on using Docker with python checkout these blogs -> **Docker and Tensorflow and also Docker and YOLO**
Let’s go ahead and check each of these files now.
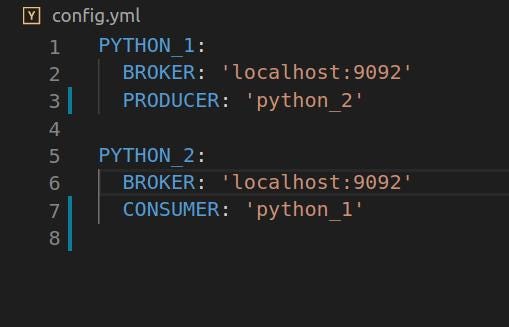
Config.yml : *Contains the topic list and from which the two programs are going to read. Also contains the broker information. A kafka topic retains a certain message for a certain amount of topic. Kafka topics can be also be broken down into partitions. Users can then send specific messages in these partitions. To understand more about Kafka topics and partitions check this link out -> [Kafka topics and partitions](http://cloudurable.com/blog/kafka-architecture-topics/index.html) . ***A Kafka consumer reads messages from a particular topic and the Kafka produces/sends messages to topics.
KafaConsumer.py and KafkaProducer.py : **These two files contains the classes for the *Kafka Consumer* and *Kafka Producer.* For complete information please refer to the [*github repo](https://github.com/AbhishekBose/kafka_python). Link given below. These two files contains classes which have been created using the *Consumer and Producer classes from the confluent_kafka library.main(operation,x,y)
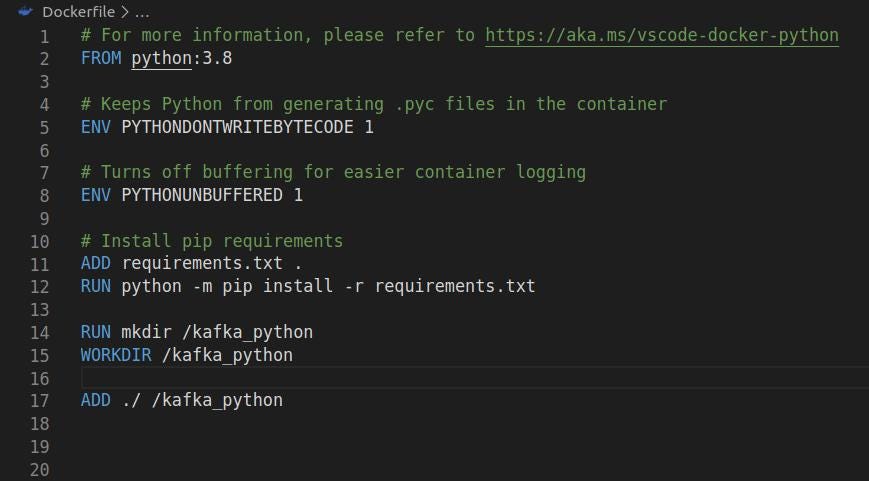
Dockerfile: *Contains the configuration for the docker container which we will be spawning. This will take a *python:3.8 image and install all required libraries using the requirements.txt file. The project folder is added to container using the *ADD *command as shown in Fig 4 below.
*Requirements.txt *: Contains a list of all the python libraries for this project
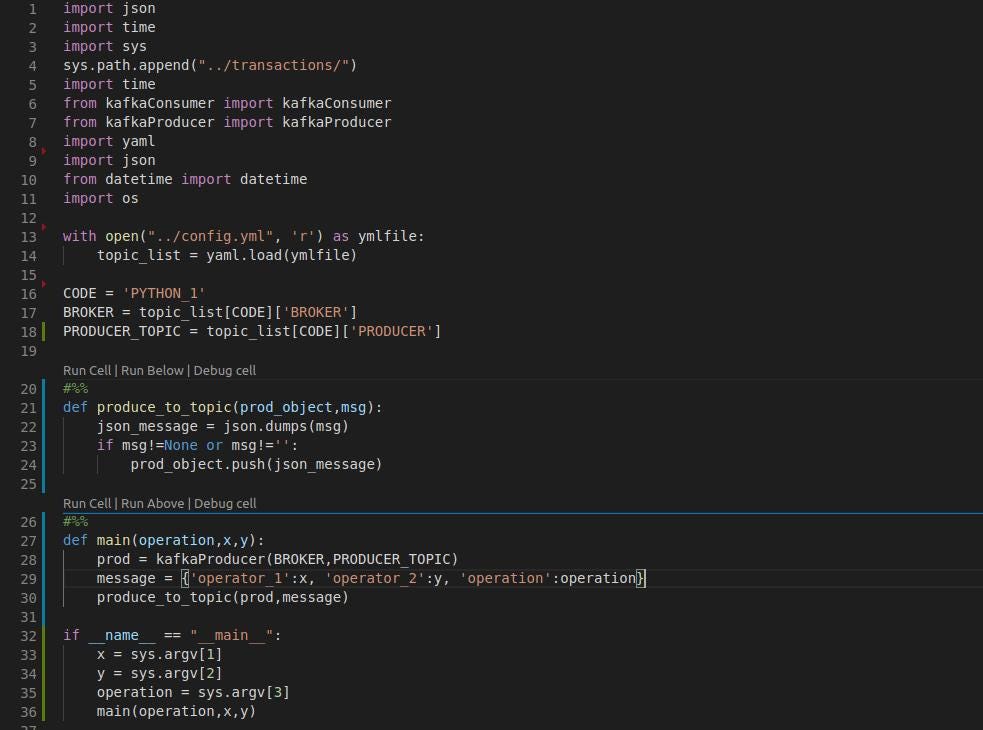
python_1.py : *This file does the task of sending a message to a topic which will be read by the second python code. The *config file is read using the *PyYaml library. *The function , defined as *main(operation,x,y) *initializes the producer object named prod and sends a message to it. The message is in a json format which can be read the second program. In this example the second function would be performing two operations namely addition and subtraction. The operations and the operators are taken as command line arguments.
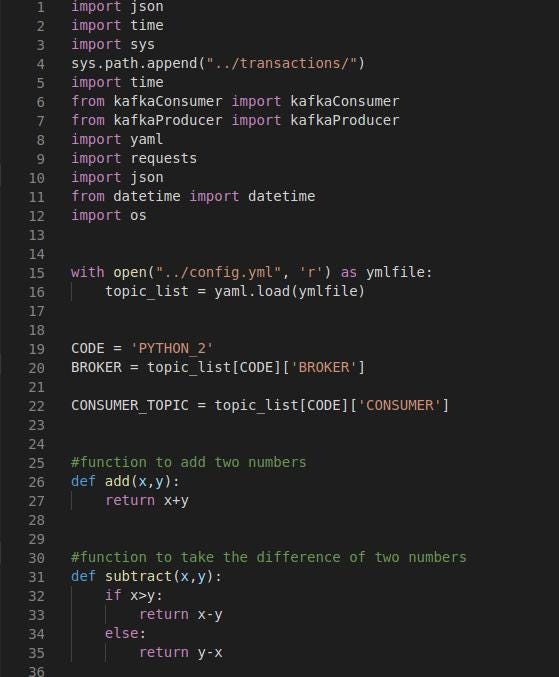
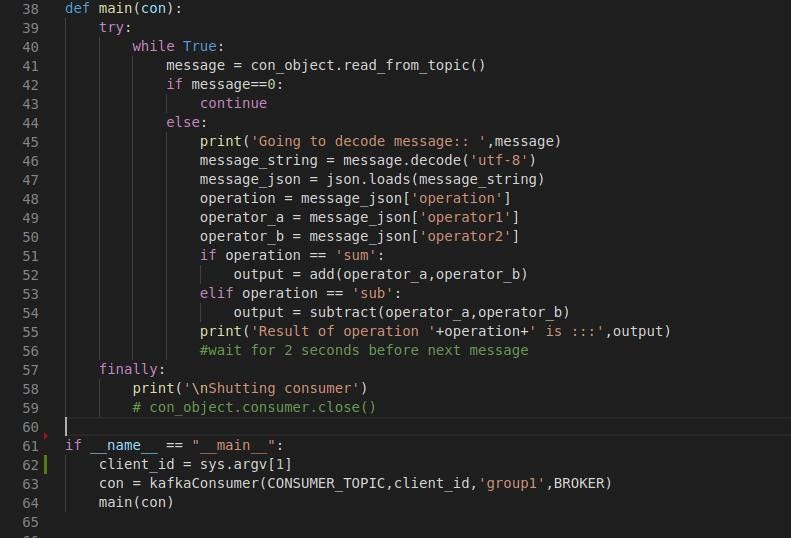
python_2.py: *This code essentially will contain the consumer. The consumer will read from the topic in which *python_1.py **will be producing the message. The two functions are defined as *add(x,y) *and *subtract(x,y). These functions will be receiving the two operators to perform the operation on, shown in Fig 6.1. The main function defined in Fig 6.2 is while loop which continuously reads from the consumer topic. This function checks the *operation which was sent by the previous code by reading the message in a json format and calls the respective function. If the operator in the message is sum then the add function is called otherwise the subtract function is called.
3. Building the image and running the container:
In order to build the image type the command:
docker build -t 'image_name' .Once the image is built, spawn a container by typing the following command:
docker run -it -d --name=container_name --network=host image_name4. Executing the programs:
Go inside the container by typing the following command:
docker exec -it container_name bashThis will get you inside. The above container opens up the bash shell inside the container.
Run the following commands in two separate shells to witness the output
Run the consumer first
cd src
python python2.py 0
The 0 here is the client id which gives a name to your consumer. You can have multiple consumers reading from the consumer topic. This ensures parallel processing as shown in Fig 7.1. Just assign a different client id to each consumer.

Now execute the producer by :
python python1.py 5 2 sumThe operation here is sum and the operators are 5 and 2 (Fig 7.2)
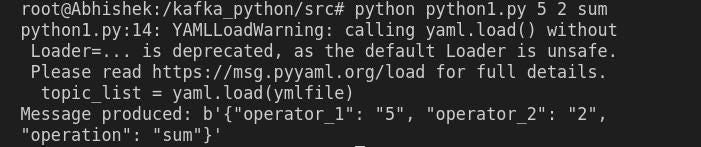
The output can be immediately seen with the result of the addition operation on the previously shell as shown in Fig 7.3

5. Conclusion:
This project was a basic example how Kafka can be extensively used for creating massive, parallel data pipelines. At **NAYAN Technologies** we use Kafka extensively for our deep learning inference and training data pipelines.
Github repo: ***https://github.com/AbhishekBose/kafka_python***